

How do I create PointSolutions content as a Mac User?
PART I: CREATING THE PRESENTATION
Add Question Slides
- Open PointSolutions and sign in to your account.
- Click Start Now under PowerPoint Polling.
- PointSolutions opens a floating toolbar. If needed, you can drag this toolbar to another monitor
- Open a new or existing PowerPoint presentation.
- Click New from the PointSolutions toolbar and select your desired question type (for this example, we will use Multiple Choice, which is the most often used). This will create a new slide.
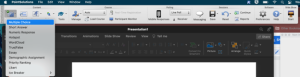
- Click on the Question field and enter a question, then on the Answers field and type up to 10 possible answer choices. Below is what it will look like initially (more answer choices appear each time you hit Enter within the answers box)

- After you’ve finished creating answer choices, click the Refresh button (next to New in the PointSolutions toolbar) to have the question settings sync to how many answers you’ve entered.
Select Correct Answer and Add Objects (Optional)
- In the PointSolutions Slide Pane to the right of the slide, click on the Slide tab
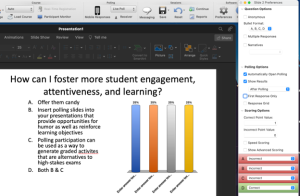
- Anonymous: If you want to use participation results as a way to check for attendance or to create graded items in the Moodle gradebook, leave this box UNCHECKED
- Multiple Responses: If you want students to be able to select multiple answers, check this box. This will present you with some additional options.
- Polling Options: As a default, polling will start automatically when you reach a slide containing a question, and after the question has closed, the results will be displayed. Uncheck either box if you do not want this behavior.
- Correct Point Value is a way you can weight one question against another if needed, otherwise the default value is 1 point. If you want participation data to award a point regardless of correctness, you can set incorrect point value to 1 point as well.
- Select the correct answer(s) from the drop-down menu.
Features in the Objects menu (optional):
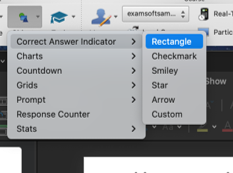
- Click Objects from the PointSolutions ribbon.
- Correct Answer Indicator – select the indicator of your choice.
- Countdown – a timer visible to all participants. Offers the option to add more time during the question.
- Response Counter – makes the counter visible for participants
When you click through the presentation, polling will open upon arriving at the slide (unless that default setting is changed).
PART II: USING POLLING IN CLASS
Your students will be able to participate in polling from their phones or on their laptops. For guidance, students should visit the Academic Technology for Students section of the IT Portal’s FAQ page.
Launching the Session
- Open PointSolutions and sign in to your account.
- Click PowerPoint Polling.
- Open your presentations – if you want to use polling in multiple PPTs, open them all at this time
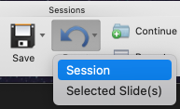
- In the PointSolutions toolbar, click Reset and select Session. If you get to a presentation during polling that you forgot to reset, select current and future slides and reset selected slide(s).
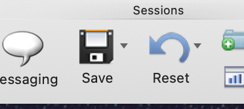
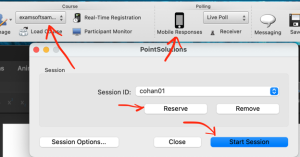
- In the PointSolutions toolbar, select the course
- Click on Mobile Responses
- If you want to set a custom session ID, click on Reserve and set the session name
- Click on Start Session. Students need to know the Session ID to join the session.
- As students join your session, you will see the Connected number increase.
Running the Show
- Start your first Slide Show by clicking the Start button, far right end of the floating toolbar

- Polling will open automatically when you arrive at a question slide, and a control toolbar will appear at the top of your screen (see below). It should appear only on the presenter’s view monitor if using presenter view (2 monitors).
- Depending on question settings (see above), students may see responses as they come in.
- **A 2nd click to advance the slide show will close the polling BUT ALSO ADVANCE to the next slide. To remain on the slide to see results and the correct answer, click the RED square stop button in the toolbar:

- The next click to advance will move on to the next slide.
- Continue advancing through the presentation(s). As you finish each slideshow, you can close them without saving except for the final one.
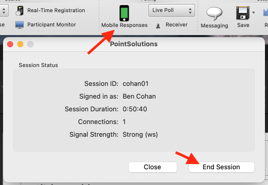
- Click on Mobile Responses and close the current session
- When you finish the final presentation, BEFORE you close it, ensure the correct course is selected and then click Save from the PointSolutions toolbar and select Save and Upload. This will create a single session with participation data for all slideshows, save it locally on your computer, and upload it to the gradebook of the selected Moodle course.

- Close PowerPoint to return the PointSolutions dashboard.
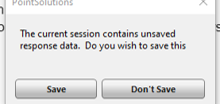
- NOTE: If you close the final presentation without saving/uploading in PowerPoint, you will see a pop-up message asking if you want to save the session data. Save this session unless you don’t care about the data. See the Results Manager section below to upload previous sessions.
PART III: MANAGING DATA
Once you are returned to the PointSolutions dashboard, click on the MANAGE tab. Here you have access to locally saved session files.
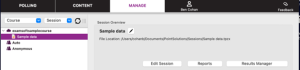
Edit Session
Click Edit Session to correct or change questions (i.e. change the correct answer) edit points awarded, or exclude the question from grading. If you edit session data after “save and upload”, you can re-upload the session to the Moodle course which will update the information already in the grade book.

Reports
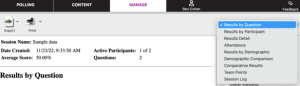
Clicking on Reports will allow you to see statistics about your session. Select a report style from the pulldown menu on the right. If you like, you can download the report from the Export options on the left.
Results Manager
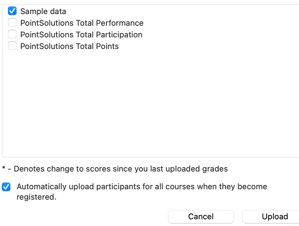
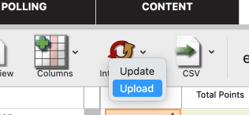
Click on Results Manager to upload locally saved data to your Moodle course gradebook. Choose the session you want, click Integrations, and choose Upload. In the following dialog box, choose the sessions you want to upload. Once uploaded, you can rename the sessions if needed in the gradebook.
Need Extra Support?
Reach out to the TLC team any time you’d like a hand setting up PointSolutions content in your presentations.
-
- Email: tlc@neco.edu
- Send us a request: Request Support