
Skip to main content
How do I...?
Managing Panopto Recordings Created by Zoom
PLEASE NOTE: You can now set up your Zoom recordings to go automatically to specific course folders! See this guide on how to Assign folders for incoming meeting recordings!.
Moving the Panopto Sessions to the Correct Course Folder
Please keep in mind, these instructions pertain to the IOR of the course. IF you are teaching as part of a team, but you are not the IOR, please coordinate with your IOR.
Students will not be able to view recordings of classes made by Zoom until the following steps are taken.
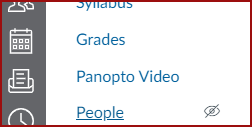
- Go to your course’s Panopto Video section.
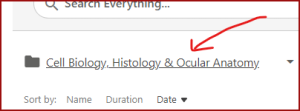
- Click on the current folder at the top
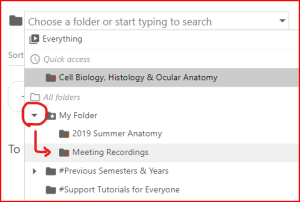
- Click on the little left-hand arrow to expand “My Folder” and choose “Meeting Recordings” within it.
- Hover your mouse over the session to be moved to reveal the buttons, and click on the gear
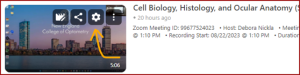
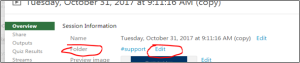
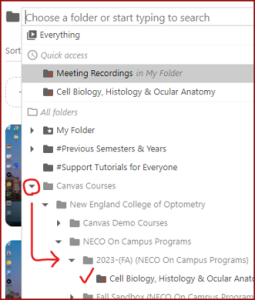
- Click on “Edit” next to the current folder location and choose your desired course folder as the destination from the pull-down list that appears. Canvas course folders are nested within the directory as seen below:
- Expand the folders using the little arrows to the left and drill down to find your folder …
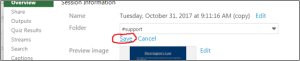
- … then click on “save”
- Feel free to also edit the name of the session to reflect the content/topics or the specific date/time of the recording. This will help keep them distinguished and identifiable for you and your students.
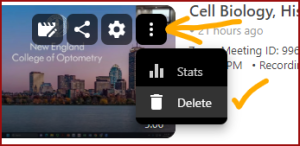
- To delete an unwanted recording, hover over the session, expand the three dots menu, and click the Delete button:
NOTE: NECO ZOOM RECORDINGS HAVE A 30-DAY AUTO-DELETE TIMER AS DEFAULT. This eliminates the need for instructors to perform recording management tasks in Zoom.
Need Extra Support?
Reach out to the TLC team any time you’d like a hand managing your Panopto recordings.
-
- Email: tlc@neco.edu
- Send us a request: Request Support