

Skip to main content
How do I...?
Point Solutions Setup Guide
Point Solutions is a PowerPoint polling application for engaging learners and collecting performance data. This document will outline the steps needed for NECO faculty to sync the Point Solutions app with courses in Canvas, download the desktop application, and verify that the students enrolled in a particular course have created participant accounts that are linked to that course.
Part 1 | The following steps will need to be performed every semester for every course by the IOR ONLY:
Enable the PointSolutions LTI in the Course Navigation.
- Select your course from the Dashboard and click Settings at the bottom of the Course Navigation list.
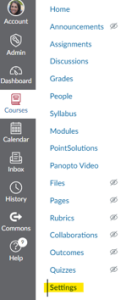
- Click on the Navigation tab (see below).
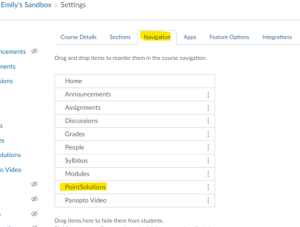
- Drag and drop the PointSolutions item to the top section to enable it. Scroll to the bottom and click Save.
IMPORTANT: Be sure your course is “Published” before continuing
- Once enabled, you will be able to click on the link in the Course Navigation list. You will be redirected to a single sign-on window in Chrome. Select your NECO email.
- Once you have signed in you will directed to the PointSolutions portal.
- Select the Canvas tab at the top of the page and click “Add” to activate your course in PointSolutions.

- Select the “Active courses” tab and you should see your course with the number of students listed as “participants”. If you expect this number to be higher, this gets resolved when we sync the course roster. Skip to step 4 of Part 2.
Part 2 | The following steps will need to be performed every semester for every course by all faculty using polling in the course:
- Click on the newly added PointSolutions Registration external tool which will launch the Echo360 login page in a new tab.
- Login to Point Solutions powered by Echo360
- If you do not have an account already, email helpdesk@neco.edu to get set up as an instructor. (if you make your own account, this will make you a participant, not an instructor)
- After logging in, select the Canvas tab at the top of the page and click “Add” to activate your course in Point Solutions.
- Select the “Active courses” tab and you should see your course with the number of students listed as “participants”. If you expect this number to be higher, this gets resolved when we sync the course roster.
- In advance of your first lecture, find your course tile in your Active Course tab and click “select”. On the course page, click on the Roster tab to view your registered students. Students who have properly registered for their participant Echo360 account will show up with green check marks for Subscription and Account Linked. Remind anyone without these marks to set up their Echo360 account.
- Ensure that the PointSolutions desktop app is NOT running on your computer and then click on “Update Course” to sync your roster with Moodle. Then relaunch your app.
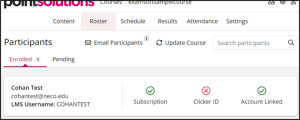
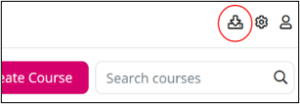
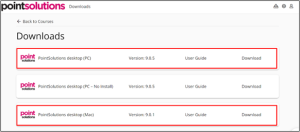
- Next, install the Point Solutions desktop application to your Mac or PC. You can find the link to download the application at instructor.turningtechnologies.com, after logging in and clicking the download icon at the top right corner of the page. You will see a list of current and former versions of the application. Please download PointSolutions desktop for Mac or PC as shown and NOT the TurningPoint Web software.
- During installation, be sure to UNCHECK the box for “Always launch PointSolutions when starting PowerPoint”.
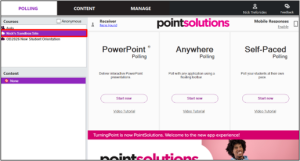
- After installation is complete, open the Point Solutions application on your computer, sign into it and look for the course that you added on the top left to confirm that it has been synced. Synced courses should have the cloud icon next to them.
Need Extra Support?
Reach out to the TLC team any time you’d like a hand setting up PointSolutions in your course.
-
- Email: tlc@neco.edu
- Send us a request: Request Support